Contents
- 1 Change Camera Privacy Settings
- 2 Re-install the Camera Driver
- 3 Reset the Camera App
- 4 Replace Built-in Camera App with Another Webcam App
- 5 Check for a Camera Switch or Button on Your Device
- 6 Install or Update Camera Driver Using Device Manager
- 7 Roll Back Webcam Driver
- 8 Check the Windows 10 Camera Privacy Settings
- 9 Check your antivirus software
- 10 Error Codes Lead to Windows 10 Camera Not Working
- 11 Conclusion
- 12 FAQ
- 12.1 How do I change camera privacy settings on Windows 10?
- 12.2 How can I re-install the camera driver on Windows 10?
- 12.3 How do I reset the camera app on Windows 10?
- 12.4 Can I replace the built-in camera app with another webcam app on Windows 10?
- 12.5 What should I do if there is a camera switch or button on my device?
- 12.6 How can I install or update the camera driver using Device Manager?
- 12.7 How do I roll back the webcam driver on Windows 10?
- 12.8 How do I check the camera privacy settings on Windows 10?
- 12.9 How can I check if my antivirus software is blocking the camera?
- 12.10 Are there specific error codes for camera not working issues on Windows 10?
If you’re dealing with a camera not working issue on your Windows 10 laptop, don’t fret. I’ve got you covered. In this article, I’ll guide you through troubleshooting and fixing the problem. We’ll explore various methods, including adjusting camera privacy settings, reinstalling the camera driver, and resetting the camera app. Let’s dive in and get your camera working again in no time!
Key Takeaways:
- Adjust camera privacy settings to ensure the camera is enabled for use on your Windows 10 laptop.
- Reinstall the camera driver to resolve any driver-related issues that may be causing the camera not to work.
- Reset the camera app to its default settings to eliminate any app-specific issues.
- Consider using alternative webcam apps as a workaround if the built-in camera app continues to have problems.
- Check for a physical camera switch or button on your device that may be inadvertently turned off.
Change Camera Privacy Settings
One possible reason for the camera not working on your Windows 10 laptop is incorrect camera privacy settings. You can fix this issue by following these steps:
Press the Windows key and type “camera privacy” in the search bar, then open “Camera Privacy settings.”
Alternatively, go to “Settings -> Privacy -> Camera” on your Windows 10 computer.
Make sure the toggle for “Allow access to the camera on this device” is turned on.
Scroll down and ensure that the “Allow apps to access your camera” toggle is also enabled.
Check the list of apps that can access the camera and enable the toggle for the app where the camera is not working.
Turn on the toggle for “Allow desktop apps to access your camera.”
Open the “Camera” app to see if the camera is now working properly.
Correcting the camera privacy settings can often resolve the camera not working issue on Windows 10. By ensuring that the necessary permissions are enabled, you can restore the functionality of your laptop’s camera. Once you have made these changes, open the camera app to verify if the problem has been resolved.
However, if the camera issue persists, there may be other underlying causes, such as driver problems or hardware issues, that require further troubleshooting. In the following sections, we will explore additional solutions to help you fix the camera not working problem on your Windows 10 laptop.
Re-install the Camera Driver
If changing camera privacy settings didn’t solve the issue, the next step is to re-install the camera driver. Here’s how to do it:
Press the Windows key + X or right-click on the Start Menu icon to open the Quick Menu, then click on “Device Manager.”
In the Device Manager window, expand the “Cameras” menu and right-click on your laptop’s camera hardware.
Click on “Uninstall device” and then click on “Action” and choose “Scan for hardware changes.”
Windows 10 will reinstall the camera driver automatically. You can also restart your PC to ensure the driver installation is complete.
If the camera still doesn’t work, right-click on the webcam hardware in Device Manager and select “Update driver.”
Windows 10 will search for the latest driver on the internet and install it. Restart your PC once the installation is complete.
If you’re still experiencing camera issues on your Windows 10 laptop after re-installing the camera driver, there may be other underlying causes that require further troubleshooting.
| Issue | Possible Solution |
|---|---|
| Camera still not detected | Check if there’s a camera switch or button on your device and make sure it’s turned on. |
| Camera app freezing or crashing | Reset the camera app. Press the Windows key, search for “camera,” click on “App Settings,” scroll down, and click on “Reset.” |
| Antivirus blocking camera access | Check your antivirus settings to ensure that the camera is not blocked. |
Try these additional solutions to resolve camera issues on Windows 10. If the problem persists, it’s recommended to seek professional help or contact the manufacturer for further assistance.
Reset the Camera App
If you’re still facing a camera not working issue on your Windows 10 laptop, resetting the camera app may help resolve the issue. Here’s a simple guide to reset the camera app:
Press the Windows key and type “camera” in the search bar, then click on “App Settings”.
Scroll down and click on “Reset”.
After a while, relaunch the camera app to see if the issue is resolved.
Resetting the camera app can help fix any app-related issues that may be causing the camera to malfunction. Give it a try and see if it resolves your camera not working problem on Windows 10.
Replace Built-in Camera App with Another Webcam App
If the built-in camera app on your Windows 10 laptop is not working, there is an alternative solution you can try. Instead of relying on the default app, you can replace it with a third-party webcam application that might offer better functionality and compatibility.
One highly recommended app is FonePaw Webcam Recorder. This application not only allows you to use your webcam but also provides additional features like screen recording and annotation. By downloading and installing this app, you can test if it resolves the camera not working issue you are experiencing.
With FonePaw Webcam Recorder, you can enjoy a seamless camera experience with the added benefit of screen recording and annotation. Give it a try to see if it solves your camera not working problem on Windows 10.
| Pros | Cons |
|---|---|
| Enhanced functionality with screen recording and annotation | Requires downloading and installing a third-party app |
| Reliable alternative to the built-in camera app | Compatibility with all webcam models may vary |
| User-friendly interface for easy navigation | May not be as integrated with the Windows 10 operating system |
Check for a Camera Switch or Button on Your Device
Some laptops and portable devices have a physical switch or button that controls the camera’s functionality. If you are experiencing a camera not detected issue on your Windows 10 laptop, it is worth checking if there is a camera switch or button on your device and ensuring that it is turned on.
If your camera switch or button is turned off, your device may not recognize the camera and display it as “camera not detected” on Windows 10. By simply toggling the switch or pressing the button, you can activate the camera hardware and resolve the issue.
Locating the camera switch or button may vary depending on the device. It is typically located on the top of the laptop screen, near the webcam, or along the side of the device. Refer to your device’s user manual or manufacturer’s website for specific instructions on how to find and enable the camera switch or button.
If you are unsure whether your device has a camera switch or button, perform a quick search online using the make and model of your device along with the keywords “camera switch” or “camera button.” This can help you find relevant information or instructions specific to your device.
By checking for and enabling the camera switch or button on your device, you can ensure that the camera is detected and resolve any camera hardware-related issues. If the problem persists after enabling the switch or button, there may be other underlying causes, and further troubleshooting steps should be taken.
Install or Update Camera Driver Using Device Manager
If your camera still doesn’t work, you can try installing or updating the camera driver using the Device Manager. Follow these steps:
- Open Settings, click on Update & security, and then click on View optional updates.
- Under the “Driver updates” section, select the newer driver update for the camera.
- Click the Download and install button to update the driver.
Updating or reinstalling the camera driver can often resolve issues related to camera not working on Windows 10. By following these steps, you can ensure that you have the latest driver installed, which may help in fixing any compatibility or functionality issues.
If you’re unsure about which driver to install or experiencing difficulties during the update process, it’s recommended to seek assistance from the manufacturer’s support website or contact their customer support for guidance.
Camera Driver Update:
| Manufacturer | Website | Latest Driver Version |
|---|---|---|
| Canon | https://www.canon.com | 4.5.6 |
| Logitech | https://www.logitech.com | 2.1.0 |
| Microsoft | https://www.microsoft.com | 3.2.1 |
Please note that the table above provides the latest driver versions for popular camera manufacturers. However, it’s important to visit the manufacturer’s official website for the most up-to-date drivers specific to your camera model.
Roll Back Webcam Driver
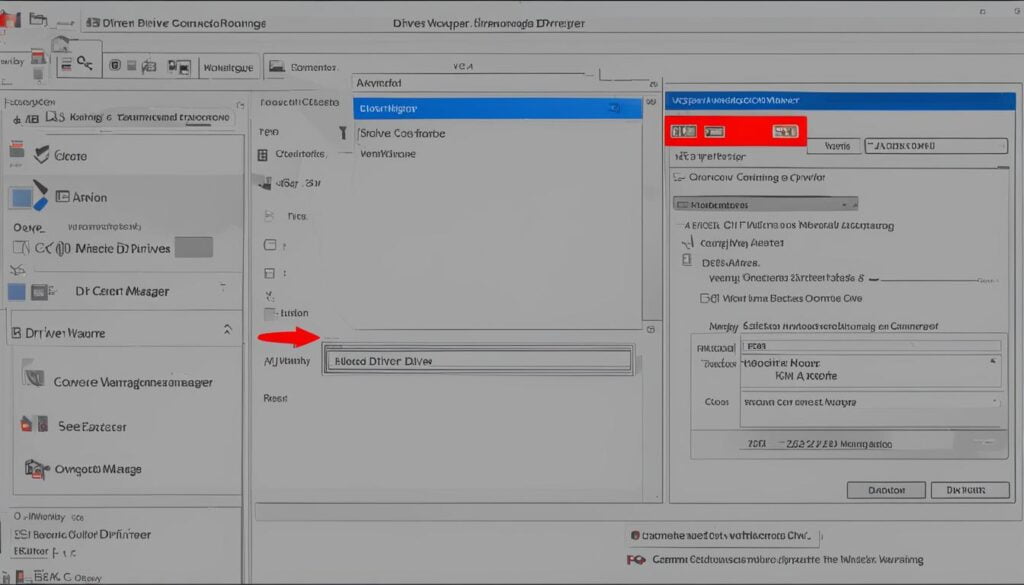
Sometimes, updating the camera drivers can cause compatibility issues. If this is the case, you can roll back the webcam driver to the previous version. Follow these steps:
- Open Device Manager.
- Expand the categories of Imaging devices, Cameras, or Sound, video, and game controllers.
- Right-click the camera and select the Properties option.
- In the “Driver” tab, select “Roll Back Driver” and follow the instructions to complete the rollback.
If rolling back the webcam driver doesn’t resolve the camera issues on Windows 10, there are other troubleshooting steps you can try. Let’s explore those options.
Table of Contents
- Section 1: Fix Camera Issues on Windows 10 Laptop Easily
- Section 2: Change Camera Privacy Settings
- Section 3: Re-install the Camera Driver
- Section 4: Reset the Camera App
- Section 5: Replace Built-in Camera App with Another Webcam App
- Section 6: Check for a Camera Switch or Button on Your Device
- Section 7: Install or Update Camera Driver Using Device Manager
- Section 8: Roll Back Webcam Driver
- Section 9: Check the Windows 10 Camera Privacy Settings
- Section 10: Check your antivirus software
- Section 11: Error Codes Lead to Windows 10 Camera Not Working
- Section 12: Conclusion
Check the Windows 10 Camera Privacy Settings
Make sure that the camera privacy settings are properly configured on your Windows 10 PC. Follow these steps:
Open Settings and click on Privacy
Go to the Start menu, click on the Settings icon, and then select Privacy.
Click on Camera
In the Privacy settings menu, click on Camera from the left-hand sidebar.
Enable access to the camera
Make sure the toggle for “Allow access to the camera on this device” is turned on. This will grant applications permission to use your device’s camera.
Choose apps with camera access
Scroll down to the “Choose which Microsoft Store apps can access your camera” section. Here, you can enable or disable camera access for individual apps by toggling the switch next to each app’s name.
By checking and adjusting your camera privacy settings, you can ensure that your Windows 10 PC allows the appropriate apps to access your camera.
Check your antivirus software
Some antivirus software may block access to the camera or restrict permission to use it. It’s important to check your antivirus settings to ensure that the camera is not blocked. This could be the reason why your camera is not working on Windows 10. If you are unsure how to navigate your antivirus settings, it is recommended to refer to the website of your antivirus software provider for assistance.
Error Codes Lead to Windows 10 Camera Not Working
When encountering a camera not working issue on Windows 10, understanding the error codes associated with the problem can provide valuable insights for troubleshooting. Here are some common error codes you may come across and their corresponding fixes:
| Error Code | Fix |
|---|---|
| Code 0xA00F4244 | Check camera privacy settings, reinstall camera driver, or reset camera app. |
| Code 0xA00F4271 | Update or reinstall the camera driver through Device Manager. |
| Code 0xC00D3E93 | Check camera privacy settings or try using a different camera app. |
| Code 0x200F424A | Update Windows or reinstall camera driver. |
If you encounter any of these error codes, refer to the corresponding fixes provided by reliable sources to resolve the camera not working issue effectively.
Conclusion
Resolving a camera not working issue on a Windows 10 laptop can be frustrating, but with the right troubleshooting steps, you can get your camera up and running again. By checking your camera privacy settings, reinstalling the camera driver, resetting the camera app, and exploring alternative webcam apps, you can address the common issues that cause camera malfunctions.
It’s important to remember that troubleshooting camera issues may involve following different methods depending on the specific error codes you encounter. By understanding the root cause of the problem, you can apply the appropriate solution.
If you have followed all the troubleshooting steps outlined in this article and your camera is still not working, consider seeking professional help or contacting the manufacturer for further assistance. They can provide additional guidance tailored to your specific laptop model and camera setup.
FAQ
How do I change camera privacy settings on Windows 10?
To change camera privacy settings on Windows 10, you can follow these steps: 1. Press the Windows key and type “camera privacy” in the search bar, then open “Camera Privacy settings.” 2. Alternatively, go to “Settings -> Privacy -> Camera” on your Windows 10 computer. 3. Make sure the toggle for “Allow access to the camera on this device” is turned on. 4. Scroll down and ensure that the “Allow apps to access your camera” toggle is also enabled. 5. Check the list of apps that can access the camera and enable the toggle for the app where the camera is not working. 6. Turn on the toggle for “Allow desktop apps to access your camera.” 7. Open the “Camera” app to see if the camera is now working properly.
How can I re-install the camera driver on Windows 10?
To re-install the camera driver on Windows 10, you can follow these steps: 1. Press the Windows key + X or right-click on the Start Menu icon to open the Quick Menu, then click on “Device Manager.” 2. In the Device Manager window, expand the “Cameras” menu and right-click on your laptop’s camera hardware. 3. Click on “Uninstall device” and then click on “Action” and choose “Scan for hardware changes.” 4. Windows 10 will reinstall the camera driver automatically. You can also restart your PC to ensure the driver installation is complete. 5. If the camera still doesn’t work, right-click on the webcam hardware in Device Manager and select “Update driver.” 6. Windows 10 will search for the latest driver on the internet and install it. Restart your PC once the installation is complete.
How do I reset the camera app on Windows 10?
To reset the camera app on Windows 10, you can follow these steps: 1. Press the Windows key and type “camera” in the search bar, then click on “App Settings.” 2. Scroll down and click on “Reset.” 3. After a while, relaunch the camera app to see if the issue is resolved.
Can I replace the built-in camera app with another webcam app on Windows 10?
Yes, you can replace the built-in camera app with another webcam app on Windows 10. One recommended app is FonePaw Webcam Recorder, which offers additional features like screen recording and annotation. You can download and install this app to see if it solves the camera not working issue.
If there is a camera switch or button on your device, make sure it is turned on. Some laptops and portable devices have a physical switch or button that turns the camera on or off. If your camera is not detected, check if there’s a camera switch or button on your device and make sure it’s turned on.
How can I install or update the camera driver using Device Manager?
To install or update the camera driver using Device Manager, you can follow these steps: 1. Open Settings, click on Update & security, and then click on View optional updates. 2. Under the “Driver updates” section, select the newer driver update for the camera. 3. Click the Download and install button to update the driver.
How do I roll back the webcam driver on Windows 10?
To roll back the webcam driver on Windows 10, you can follow these steps: 1. Open Device Manager. 2. Expand the categories of Imaging devices, Cameras, or Sound, video, and game controllers. 3. Right-click the camera and select the Properties option. 4. In the “Driver” tab, select “Roll Back Driver” and follow the instructions to complete the rollback.
How do I check the camera privacy settings on Windows 10?
To check the camera privacy settings on Windows 10, you can follow these steps: 1. Open Settings, click on Privacy, and then click on Camera. 2. Make sure the toggle for “Allow access to the camera on this device” is turned on. 3. Under the “Choose which Microsoft Store apps can access your camera” section, turn on the toggle switch for the program you want to allow camera access.
How can I check if my antivirus software is blocking the camera?
To check if your antivirus software is blocking the camera, you can refer to the website of your antivirus software provider for assistance. Some antivirus software may block access to the camera or restrict permission to use it. Make sure to check your antivirus settings to ensure that the camera is not blocked.
Are there specific error codes for camera not working issues on Windows 10?
Yes, there are various error codes that may indicate a camera not working issue on Windows 10. If you encounter specific error codes, you can refer to the error codes and their corresponding fixes provided by reliable sources to troubleshoot the issue.
