Contents
- 1 What Causes USB Ports to Stop Working?
- 2 Check and Clean Your USB Ports
- 3 Inspect Your USB Hardware
- 4 Restart Your Computer
- 5 Update Windows
- 6 Reinstall Your USB Drivers
- 7 Change Your Power Management Settings
- 8 Disable the “USB Selective Suspend Power Setting”
- 9 Run the SFC Scan
- 10 Run the DISM Scan
- 11 Conclusion
- 12 FAQ
- 12.1 What are some common reasons why USB ports stop working on Windows 10?
- 12.2 How can I check and clean my USB ports?
- 12.3 What should I do if my USB devices are not working?
- 12.4 Will restarting my computer fix USB port issues?
- 12.5 How can I update Windows to fix USB port issues?
- 12.6 How can I reinstall my USB drivers?
- 12.7 How do I change the power management settings for USB ports?
- 12.8 How can I disable the “USB Selective Suspend Power Setting”?
- 12.9 How do I run the SFC scan to fix USB port issues?
- 12.10 How do I run the DISM scan for USB port troubleshooting?
USB ports are an essential part of any computer system, allowing you to connect various devices such as external hard drives, keyboards, mice, and more. In most cases, when USB ports stop working on Windows 10, it can be fixed with a few simple steps. The potential causes of USB port issues include debris in the ports, faulty USB devices, outdated drivers, power settings, and corrupt system files. In this guide, I will walk you through the troubleshooting steps to tackle USB ports not working on Windows 10 and get them functioning again.
Key Takeaways:
- Troubleshoot USB port issues on Windows 10 with these simple steps.
- Check for debris or obstructions in the USB ports and clean them.
- Inspect your USB hardware, including cables and connectors.
- Restart your computer to clear temporary issues affecting the USB ports.
- Update Windows and USB drivers to fix software-related problems.
What Causes USB Ports to Stop Working?
USB ports are an integral part of any computer system, allowing us to connect various devices for seamless data transfer and functionality. However, there can be several reasons why USB ports may stop working. Identifying the root cause of the issue is crucial in troubleshooting and resolving USB port problems effectively. Here are some common factors that can lead to USB port malfunction:
- Debris or Obstructions in the Ports: Over time, dust, lint, or other debris can accumulate in the USB ports, impeding the connection between the port and the USB device. This can prevent the USB port from functioning correctly. Cleaning the ports thoroughly can help eliminate this issue.
- Damage to USB Devices or Cables: If the USB device or cable is damaged, it may not establish a proper connection with the port, resulting in the port not working. Inspecting the USB device and cables for any visible damage is essential in troubleshooting this issue.
- Outdated or Corrupt USB Drivers: USB drivers facilitate communication between the operating system and the USB ports. If the drivers are outdated or corrupt, they can cause USB port issues. Updating or reinstalling the USB drivers can help resolve this problem.
- Incorrect Power Settings: Power settings configured to conserve energy may affect USB port functionality. When certain power-saving options are enabled, the system may turn off specific USB ports, leading to them not working. Adjusting the power management settings can fix this issue.
- Corrupt System Files: System files related to USB port functionality can become corrupt, resulting in the ports not working correctly. Running system file scans can help identify and repair any corrupt files, resolving USB port issues caused by system file corruption.
Understanding these reasons for USB ports not working can help you troubleshoot and fix the problems effectively. In the following sections, we will delve into each of these factors in more detail and provide step-by-step solutions to resolve USB port issues.
Check and Clean Your USB Ports
One of the first troubleshooting steps when your USB ports are not working is to check for debris or obstructions in the ports. Over time, dust and debris can accumulate, hindering the connection between the port and the USB device.
To ensure proper functionality, it’s essential to thoroughly clean the USB ports. You can use a soft cloth or compressed air to remove any dirt or dust that may be blocking the connection. Be gentle when cleaning to avoid damaging the port.
If cleaning doesn’t resolve the issue, you can also try plugging a different USB device into the same port. This will help determine if the problem lies with the USB device itself or if it’s a hardware issue with the port.
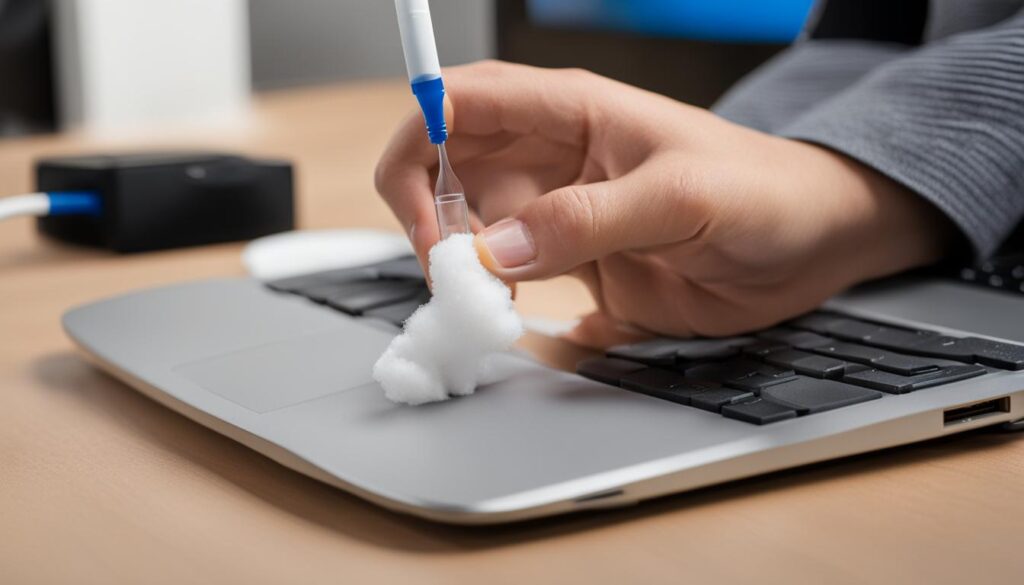
Remember, maintaining clean and debris-free USB ports can prevent future connectivity issues and ensure smooth operation.
Inspect Your USB Hardware
If a USB device is not working, it’s essential to inspect the USB hardware, including cables and connectors, to identify any potential issues. This step helps in checking USB cables and connectors, ensuring they are securely connected and not damaged or broken. Additionally, it’s crucial to verify compatibility between the USB device and the port being used by checking the device specifications.
USB cables and connectors can often be a source of problems when it comes to USB device functionality. Inspect the cables for any visible signs of damage, such as fraying or bent connectors. If any issues are detected, consider replacing the cables to resolve the problem.
Similarly, examine the USB connectors on both the device and the port. Ensure they are clean, free from debris, and not damaged. Dust or dirt in the connectors can hinder a proper connection, leading to USB port issues. Use a soft cloth or compressed air to clean the connectors gently and remove any obstructions.
Compatibility Check
Another crucial aspect to consider is the compatibility between the USB device and the port. Not all USB devices are compatible with all ports, so it’s important to verify that they are a match. Consult the device specifications or documentation to determine the type of USB connector required and the version of USB supported.
If you’re unsure about the compatibility, refer to the device manufacturer’s website or customer support for assistance. They can provide the necessary information and recommend compatible USB ports or adapters if needed.
| Issue | Solution |
|---|---|
| USB cable or connector is damaged or broken | Replace the USB cable or connector |
| Dust or debris in USB connectors | Clean the connectors using a soft cloth or compressed air |
| Incompatibility between USB device and port | Check the device specifications and consult the manufacturer for compatibility information |
By carefully inspecting your USB hardware and ensuring compatibility, you can address potential issues that may be causing your USB device to malfunction. Taking the time to check and clean the cables and connectors can go a long way in resolving USB port problems and restoring functionality.
Restart Your Computer
Restarting your computer can be a quick and effective solution for resolving USB port issues. By restarting, you can clear temporary glitches and refresh the system, potentially fixing any problems that may be affecting the USB ports. Here’s a simple guide on how to restart your computer and get your USB ports working again:
Click on the Start menu located at the bottom left corner of your screen.
Select the Power button.
Choose the Restart option from the dropdown menu.
It’s essential to save any unsaved work before restarting, as the process will shut down all active programs and applications. Once your computer reboots, check if the USB ports are functioning properly. If the issue persists, continue with the other troubleshooting methods outlined in this guide.
Why Restarting Helps
“Restarting your computer reinitializes the operating system, clears temporary files and memory, and resets various system components. This can help resolve temporary glitches or conflicts that may be causing issues with the USB ports. It’s a simple and effective step that can often fix the problem without much hassle.”
As always, it’s important to follow troubleshooting steps in a logical order, proceeding from simpler solutions to more complex ones. If restarting your computer doesn’t resolve the USB port issues, don’t worry. There are still more troubleshooting methods to try, which we’ll cover in the following sections.
Update Windows
Outdated Windows operating systems can cause USB port issues. Updating Windows to the latest version can fix bugs and address problems with USB ports caused by software issues. To update Windows, follow these steps:
- Go to the Settings menu
- Select Update & Security
- Click on the Check for updates button
- Install any available updates
- Restart your computer if prompted
Updating Windows regularly is essential for maintaining the stability and performance of your system, including the proper functioning of USB ports.
Note: It is recommended to back up your important files before performing any updates or system changes.
Frequently Asked Questions:
How often should I update Windows?
It is recommended to check for and install Windows updates regularly, as Microsoft releases updates to address security vulnerabilities, improve system performance, and fix various issues, including USB port problems. You can set up Windows to install updates automatically or manually check for updates periodically.
What if Windows updates don’t fix my USB port issues?
If updating Windows doesn’t resolve the USB port problems, you may need to try other troubleshooting steps such as checking and cleaning the USB ports, inspecting the USB hardware, and reinstalling USB drivers. It is also recommended to seek assistance from technical support or consult relevant forums for further guidance.
| Pros of Updating Windows | Cons of Not Updating Windows |
|---|---|
| Fixes bugs and software-related issues | Increased risk of security vulnerabilities |
| Improved system stability and performance | Limited access to new features and improvements |
| Ensures compatibility with the latest software and devices | Potential compatibility issues with newer software and hardware |
Reinstall Your USB Drivers
Corrupt or outdated USB drivers can cause problems with USB port functionality. Reinstalling the USB drivers can help resolve this issue. Follow the steps below:
Open the Device Manager. You can do this by right-clicking on the Start menu and selecting “Device Manager” from the context menu.
In the Device Manager window, expand the “Universal Serial Bus controllers” category to view the list of USB controllers.
Right-click on each USB controller listed and select “Uninstall device.” Confirm the uninstallation if prompted.
Once all USB controllers have been uninstalled, reboot your system. This will allow Windows to automatically reinstall the necessary drivers.
After your computer restarts, check if this fixes the USB port issues. If the problem persists, continue troubleshooting using the other methods mentioned in this guide.
Remember that reinstalling USB drivers can help resolve many USB port-related issues, so it’s an important step to consider.
Important Note:
Before uninstalling the USB controllers, it’s recommended to create a system restore point or backup your important files to avoid any potential data loss.
If your system doesn’t automatically reinstall the USB drivers after the reboot, you can try manually updating them by right-clicking on the “Universal Serial Bus controllers” category in Device Manager and selecting “Scan for hardware changes.”
| Pros of Reinstalling USB Drivers | Cons of Reinstalling USB Drivers |
|---|---|
|
|
Change Your Power Management Settings
Power-saving settings can sometimes cause USB port issues by turning off specific ports or devices to save battery life. To resolve this problem, you need to adjust the power management settings for your USB ports and disable power-saving.
To begin, open the Device Manager by right-clicking on the Start button and selecting “Device Manager” from the context menu. Once the Device Manager window opens, expand the “Universal Serial Bus controllers” category by clicking on the arrow next to it.
Next, locate the USB Control Hub or Generic USB Hub device. Right-click on it and select “Properties” from the drop-down menu.
A properties window will appear. Go to the “Power Management” tab by clicking on it. You will see a checkbox that says “Allow the computer to turn off this device to save power.”
Action: Disable power-saving for USB ports
Uncheck this box to disable power-saving for your USB ports. This action ensures that the ports stay operational and prevent any interruptions caused by power management settings.
Click on the “OK” button to apply the changes.
Once you have disabled power-saving for USB ports, check if the USB ports start working again. If not, continue troubleshooting by following the other steps in this guide.
Disable the “USB Selective Suspend Power Setting”
If you’re facing USB port issues caused by power settings, disabling the “USB Selective Suspend Power Setting” can help resolve the problem. Follow these steps to disable the setting:
Open the Control Panel on your Windows 10 computer.
Navigate to Hardware and Sound.
Click on Power Options.
Under your selected power plan, click on Change plan settings.
Click on the Change advanced power settings link.
A dialog box will appear. Expand the USB settings option.
Locate the USB selective suspend setting.
Select “Disabled” from the drop-down menu.
Apply the changes and close the dialog box.
After disabling the “USB Selective Suspend Power Setting,” check if your USB ports are functioning properly.
Why Disable the “USB Selective Suspend Power Setting”?
The “USB Selective Suspend Power Setting” is designed to conserve power by selectively suspending USB devices when they are not actively in use. However, this setting can sometimes cause issues with USB port functionality, leading to devices not being recognized or not working properly. Disabling this setting ensures that the USB ports remain active at all times, preventing any power-related problems.
By following these steps to disable the “USB Selective Suspend Power Setting,” you can effectively troubleshoot and fix USB port issues caused by power settings.
| Pros | Cons |
|---|---|
| Resolves USB port issues caused by power-saving settings. | Disabling power-saving may impact battery life on portable devices. |
| Ensures USB ports remain active, improving device connectivity. | Might not fix underlying hardware problems with USB ports. |
| Easy to implement through Control Panel settings. | Requires administrative access to make changes to power settings. |
Run the SFC Scan
To fix USB port issues on Windows 10, one effective troubleshooting step is to run the System File Checker (SFC) scan. This scan helps detect and repair corrupt or damaged system files that may be causing the problem with your USB ports.
Here’s how you can run the SFC scan:
- Open the Command Prompt as an administrator. To do this, right-click on the Start button and select “Command Prompt (Admin)” from the menu that appears. A Command Prompt window will open.
- In the Command Prompt window, type the command
sfc /scannowand press Enter. The scan will now start. - Wait for the scan to complete. This process may take some time, so be patient.
- Once the scan is done, check if any issues with the system files related to USB ports have been detected and fixed.
If the SFC scan successfully repairs any corrupt or damaged files, it might resolve the USB port issues you were experiencing. However, if the problem persists, you may need to try other troubleshooting methods.
Remember to follow the remaining steps in this guide to ensure you’ve covered all possible solutions for fixing USB port problems on Windows 10.
Run the DISM Scan
The Deployment Image Servicing and Management (DISM) scan is a powerful tool that can help troubleshoot and resolve USB port issues caused by corrupt system files. By scanning and repairing any corruption within the system files, the DISM scan can restore the proper functionality of the USB ports.
To run the DISM scan, follow these steps:
- Open the Command Prompt as an administrator by right-clicking on the Start menu and selecting “Command Prompt (Admin)”.
- In the Command Prompt window, type or paste the following command: DISM /Online /Cleanup-Image /RestoreHealth
- Press Enter to initiate the scan.
Allow the scan to complete, which may take some time depending on the system’s configuration. The DISM scan will analyze the system files, detect any corruption, and attempt to repair them.
Once the scan is finished, check if the USB port issues have been resolved. If not, you may need to try additional troubleshooting steps or seek further assistance.
DISM Scan Example:
To run the DISM scan, follow these steps:
- Open the Command Prompt as an administrator.
- Type or paste the following command: DISM /Online /Cleanup-Image /RestoreHealth
- Press Enter.
By running the DISM scan, you can effectively tackle USB port issues caused by corrupt system files, ensuring the smooth functioning of your USB ports.
Conclusion
USB ports not working on Windows 10 can be frustrating, but with the right troubleshooting steps, you can resolve the issue and get your USB ports functioning again. By checking and cleaning the USB ports, inspecting the USB hardware, restarting your computer, updating Windows and USB drivers, adjusting power management settings, and running SFC and DISM scans, you can tackle USB port issues effectively.
Remember to always ensure compatibility between USB devices and ports and keep your operating system and drivers up to date. This will help ensure smooth communication between your USB devices and the Windows 10 operating system. Regularly updating Windows and USB drivers can provide bug fixes and enhance the performance of your USB ports.
Additionally, taking proper care of your USB ports by checking for debris or obstructions and cleaning them regularly can prevent connectivity issues in the future. Inspecting the USB hardware, including cables and connectors, is essential to identify any faulty components that may be causing problems.
By following these troubleshooting steps and maintaining a proactive approach, you can enjoy seamless USB connectivity on your Windows 10 system, allowing you to connect and use a wide variety of USB devices effortlessly.
FAQ
What are some common reasons why USB ports stop working on Windows 10?
USB ports may stop working due to debris or obstructions in the ports, damaged USB devices or cables, outdated or corrupt USB drivers, incorrect power settings, and corrupt system files.
How can I check and clean my USB ports?
To check for debris or obstructions, use a soft cloth or compressed air to clean the ports and remove any dirt or dust. You can also try plugging a different USB device into the same port to rule out a hardware problem.
What should I do if my USB devices are not working?
If a USB device is not working, check the cables and connectors to ensure they are securely connected and not damaged. Verify that the USB device is compatible with the port you’re using.
Will restarting my computer fix USB port issues?
Yes, restarting your computer can help clear temporary issues that may be affecting the USB ports. Save any unsaved work before restarting and check if the USB ports are working again after the reboot.
How can I update Windows to fix USB port issues?
To update Windows, go to the Settings menu, select Update & Security, and click on the Check for updates button. Install any available updates and restart your computer if prompted.
How can I reinstall my USB drivers?
Open the Device Manager, expand the Universal Serial Bus controllers category, and uninstall all the USB controllers listed. Reboot your system and allow Windows to automatically reinstall the necessary drivers. Check if this fixes the USB port issues.
How do I change the power management settings for USB ports?
Open the Device Manager, expand the Universal Serial Bus controllers category, right-click on the USB Control Hub (or Generic USB Hub) device, go to the Power Management tab, and uncheck the box next to “Allow the computer to turn off this device to save power.” Apply the changes and see if the USB ports start working again.
How can I disable the “USB Selective Suspend Power Setting”?
Open the Control Panel, navigate to Hardware and Sound > Power Options > Change plan settings, and click on the Change advanced power settings link. Expand the USB settings option and the USB selective suspend setting. Select “Disabled” from the drop-down menu. Apply the changes and check if the USB ports are functioning properly.
How do I run the SFC scan to fix USB port issues?
Open the Command Prompt as an administrator and run the command “sfc /scannow”. Wait for the scan to complete and see if it detects and fixes any issues with the system files related to USB ports.
How do I run the DISM scan for USB port troubleshooting?
Open the Command Prompt as an administrator and run the command “DISM /Online /Cleanup-Image /RestoreHealth”. Allow the scan to complete and see if it resolves the USB port problems caused by corrupt system files.
